Handler's Spot!
-
Introduction
This is a how to for sending a Remote Desktop Assitance request via email for Windows XP.
What is Remote Desktop Assistance (RDA)? The Remote Desktop feature in Windows XP Professional gives you access to all the programs, resources, and accessories on your computer from another Windows-based computer. Get answers to common questions about using Remote Desktop. That link will take you to Micosofts website dealing with RDA for Windows XP.
How does this page work? There are arrows to the left and right of this frame. Click on them to move, the right arrow will increase the step and left will decrease the step. If you feel more comfortable you may click on the numbered tabs just below this frame.
Each set of instructions has a corresponding graphic for demonstration purposes. Text in red or green has correspsonding markings on the graphic to show the items location.
The only pre-requiset that is needed is you must have working knowledge of your email client. You will need to know how to attach a file to and email and send that email!
-
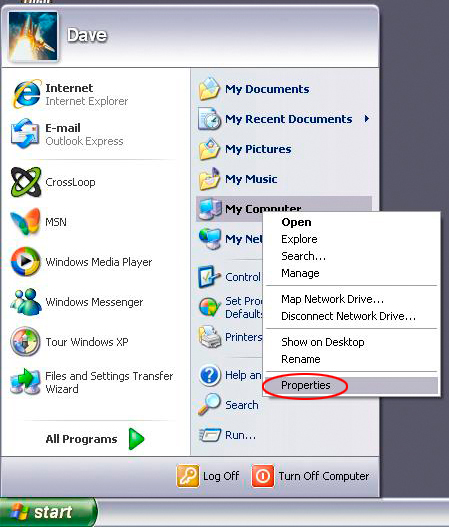
- Click on Start)

- Then (right click)
 on (My Computer)
- From the drop down list click
 on Properties
- Click on Start)
-
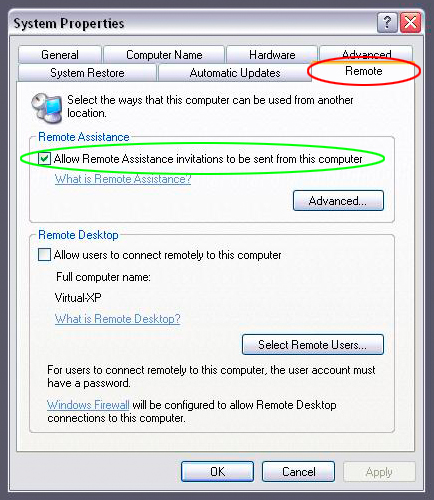
- You should now have the System Properites box. It will contain a bunch of tabs at the top of that box. Click on the Remote tab.
- Once you have clicked on the Remote tab concentrate on the area that says Remote Assistance. You want to make sure that the check box next to the sentence "Allow Remote Assistance invitations to be sent from this computer" is CHECKED
- Once that is done you may click OK.
-

Click on the Start button again and then click Help and Support. It will be located in the right hand column toward the bottom of the list.
-
In the Search box at the top left of the Help and Support window type in the words remote assistance then click the green arrow.

-
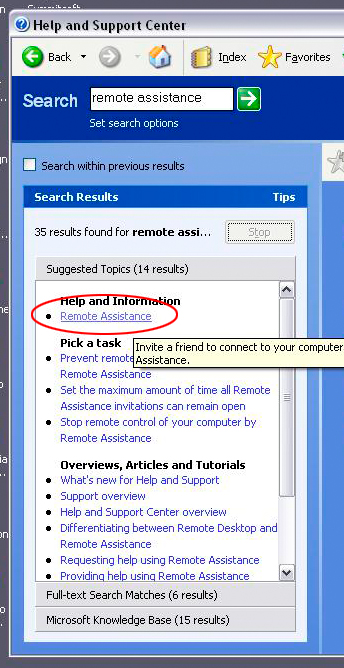
When the results come back the very first hit will be under Help and Information, you may click on Remote Assistance directly under that.
-
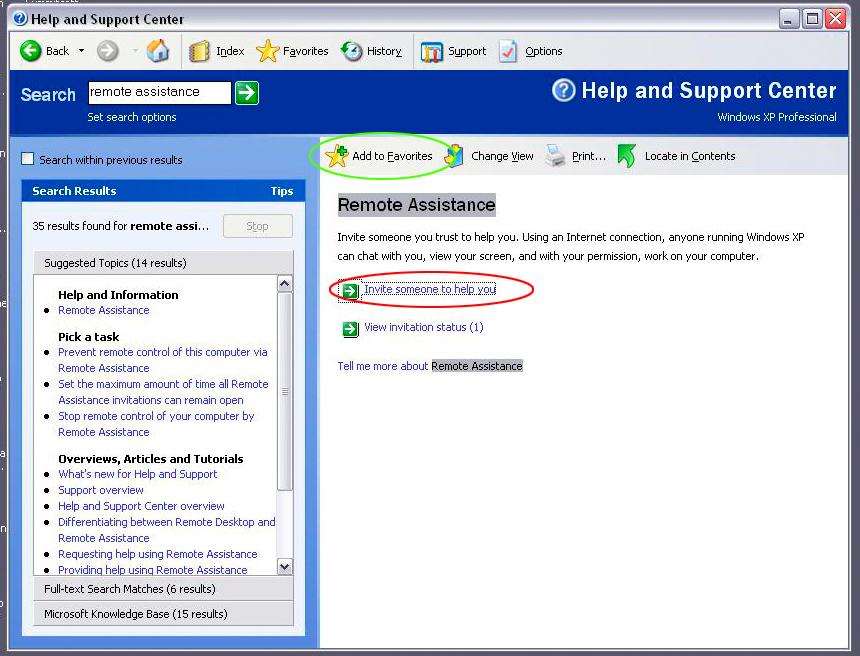
At this point do this; click on the Add to Favorites button. This will save this point in your Help and Support favorites for future reference.
Next click on Invite someone to help you
NOTE: For your information, to get to the favorites in Help and Support. Just click on the "Star" on the top of the Help and Support window.
-
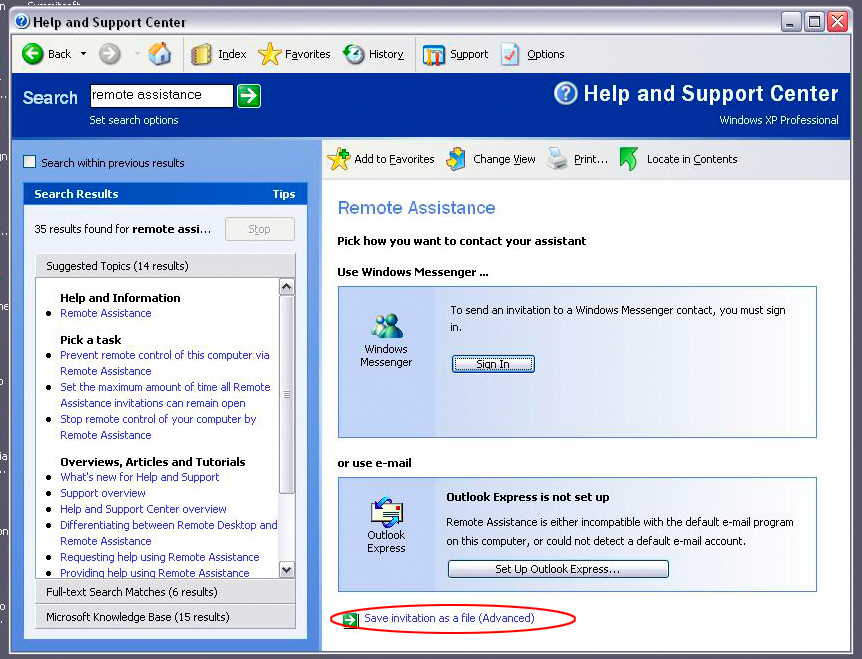
You now have three choices to use Windows Messenger, Outlook Express or save the RDA Invite to a file on the PC. In this example I'm going to assume thet the person on the other end is using a web based email such as Yahoo. To save the invite as a file to attach to an email you click on Save invitation as file (Advanced). Located at the bottom center of that windows. Go ahead, click on that!
NOTE: It is probably easier to use A) the Windows Messenger item and second easier to use B) Outlook Express. If the person doing the requesting has that option then by all means take it!
-

This will now start the process of saving the invitation to disk. Still fairly simple! On this window it will ask you to enter the From (the name you would like to appear on the invitation. Safest bet would be your own name.
Change the Set the invitation to expire time to some thing resonable. Three hours is good! You can now click Continue
-
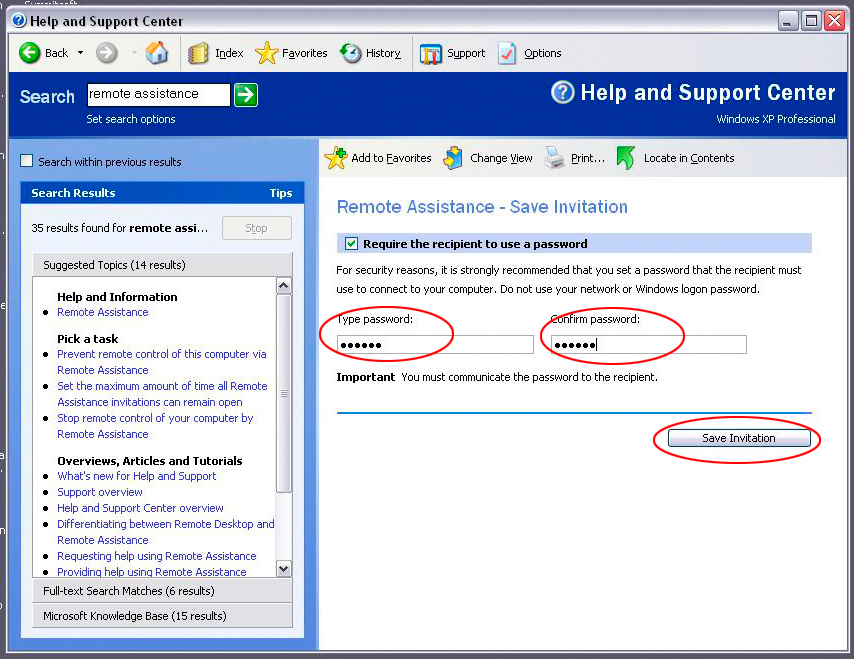
You will now be asked to enter a password twice. This password you will need to include in the email at the final stages. So write down what it is! You can now click Save Invitation
-
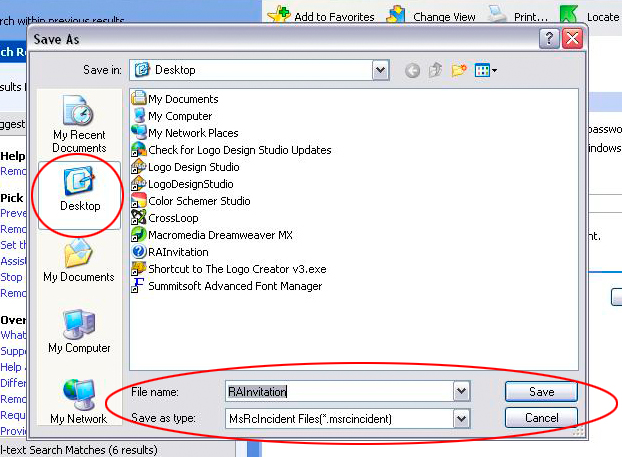
Windows will now prompt you to do a Save As. First click Desktop from the choices on the left. I would leave the name of the file what ever it's default is. But write the name down just incase you forget or need to hunt for it!!! You can now click on Save
-

Now that you have saved the file a screen will appear showing you Where you saved the file to! This is just an FYI on windows behalf
I would do this though. Just below "Send new invitation" is View the status of all my invitations. Go ahead and click on that! The screen will change
-
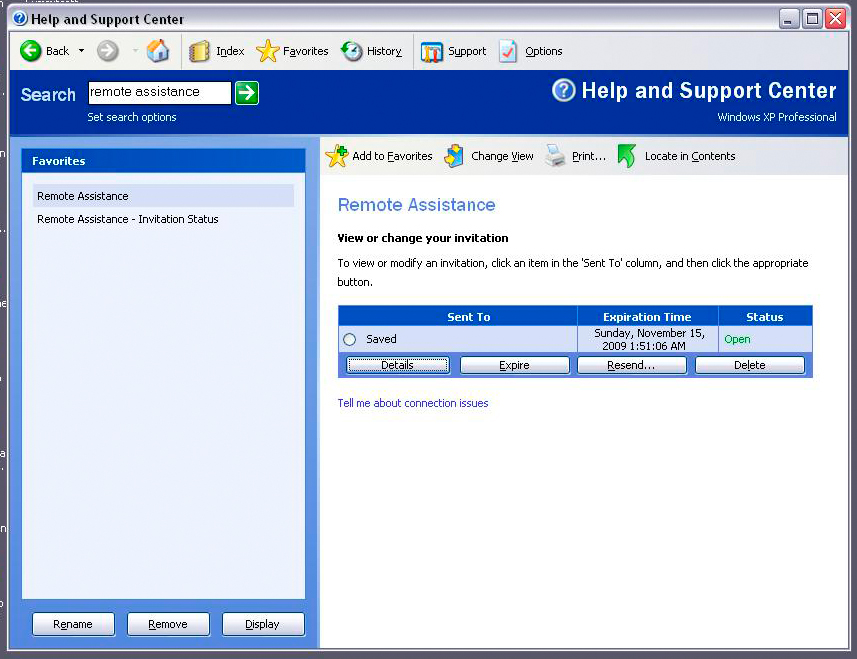
This will show you both current and past invites you have sent out, it also allows you to manipulate the invites. At this point click on the Add to favorites button so you can reference this again if you need to from Help and Support.
You can close this window as we're ready to send the invite through mail!
-
I'm assuming that you know how your email program works and how to attach files to it. Every email program and web based email is different. Adapt what I have here to what you are using.
I've already opened my Yahoo web based email and have started a new message. You can put what ever you want as the subject and body. Make sure that you include the password in the email! Else the person won't be able to log into your PC!
You can now click on the Attach button that is just to the right of the send button. Proceed to the next step!